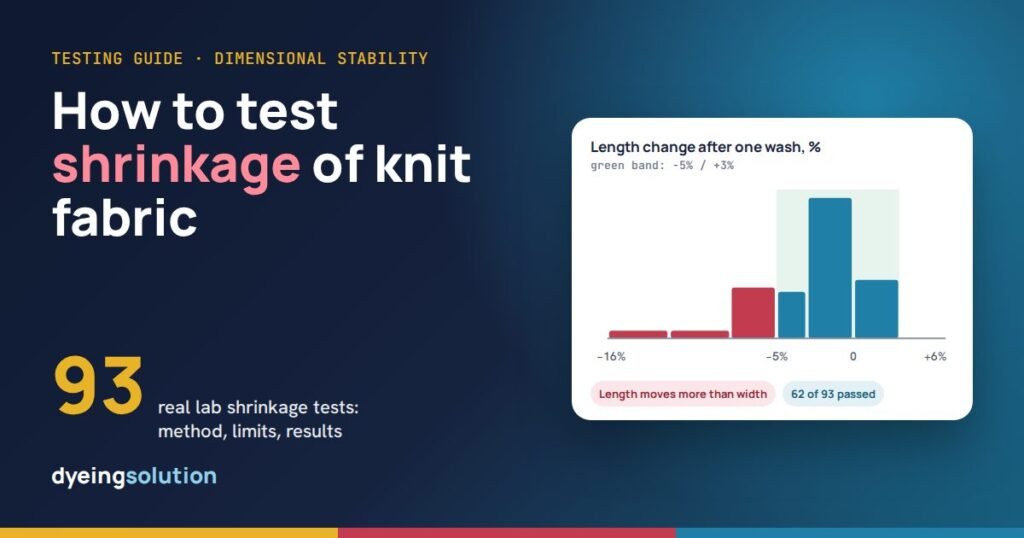
How the lab measures shrinkage after washing, step by step (ISO 3759, ISO 6330, ISO 5077), with the formula, a worked example, the limits buyers set, and what 93 real lab tests showed.
About this guide. The method below is written from the public ISO and AATCC standards in plain words. The data comes from our own lab reports on 95 new knit developments, each tested by an accredited lab to the buyer’s standard, so you can see what real results look like.
At a glance
93Shrinkage tests in our data
66%Passed
-1.6%Median length change, 1 wash
−5% / +3%Common limit
What the test measures
Dimensional stability is how much a fabric shrinks or grows when it is washed and dried the way a customer will. The lab marks fixed distances on the fabric, washes and dries it under set conditions, and measures again. The change is given in percent for length and for width: minus is shrinkage, plus is growth.
Equipment
- A front-loading reference washing machine and the reference detergent named in the standard.
- A tumble dryer, or a line or flat-drying rack, as the buyer’s care label asks.
- A steel rule or tape, an indelible marker or a marking template, and a flat measuring table.
- Ballast fabric (polyester or cotton) to make up the wash load.
- A conditioning room at 20 ± 2°C and 65 ± 4% RH.
How the test is done, step by step
- Cut the specimen. A square of at least 50 × 50 cm, away from the selvedge, or a whole garment.
- Condition it flat and free of tension for at least 4 hours (ISO 3759).
- Mark it. Put at least three pairs of marks along the length and three across the width, each pair usually 35 cm apart (50 cm on a larger specimen), well inside the edges.
- Measure each pair before washing, on a flat table without stretching.
- Wash. Make up the load with ballast and wash on the programme the buyer names: in our reports mostly a normal or mild programme at 40°C, sometimes 30°C (ISO 6330).
- Dry as specified: line dry, flat dry or tumble dry.
- Condition again and measure each pair. For a five-wash test, repeat the wash and dry five times, then measure.
- Calculate the change for each pair and average them for length and for width (ISO 5077).
Calculating the result
Dimensional change % = (measurement after − measurement before) ÷ measurement before × 100.
Worked example. Three length marks of 35.0 cm measure 33.5, 33.4 and 33.6 cm after washing. The average is 33.5 cm, so the length change is (33.5 − 35.0) ÷ 35.0 × 100 = −4.3%. Against a limit of −5% / +3%, it passes; at −5.1% it would fail.
AATCC 135 works the same way but with its own wash and dry settings, usually three washes with tumble drying.
The limits buyers use
| Limit | Tests |
|---|---|
| ±5% | 74 |
| +3/-5% | 41 |
| ±3% | 8 |
| -4%/+2% | 7 |
| 4% | 3 |
| -6%/+2% | 1 |
What real results look like
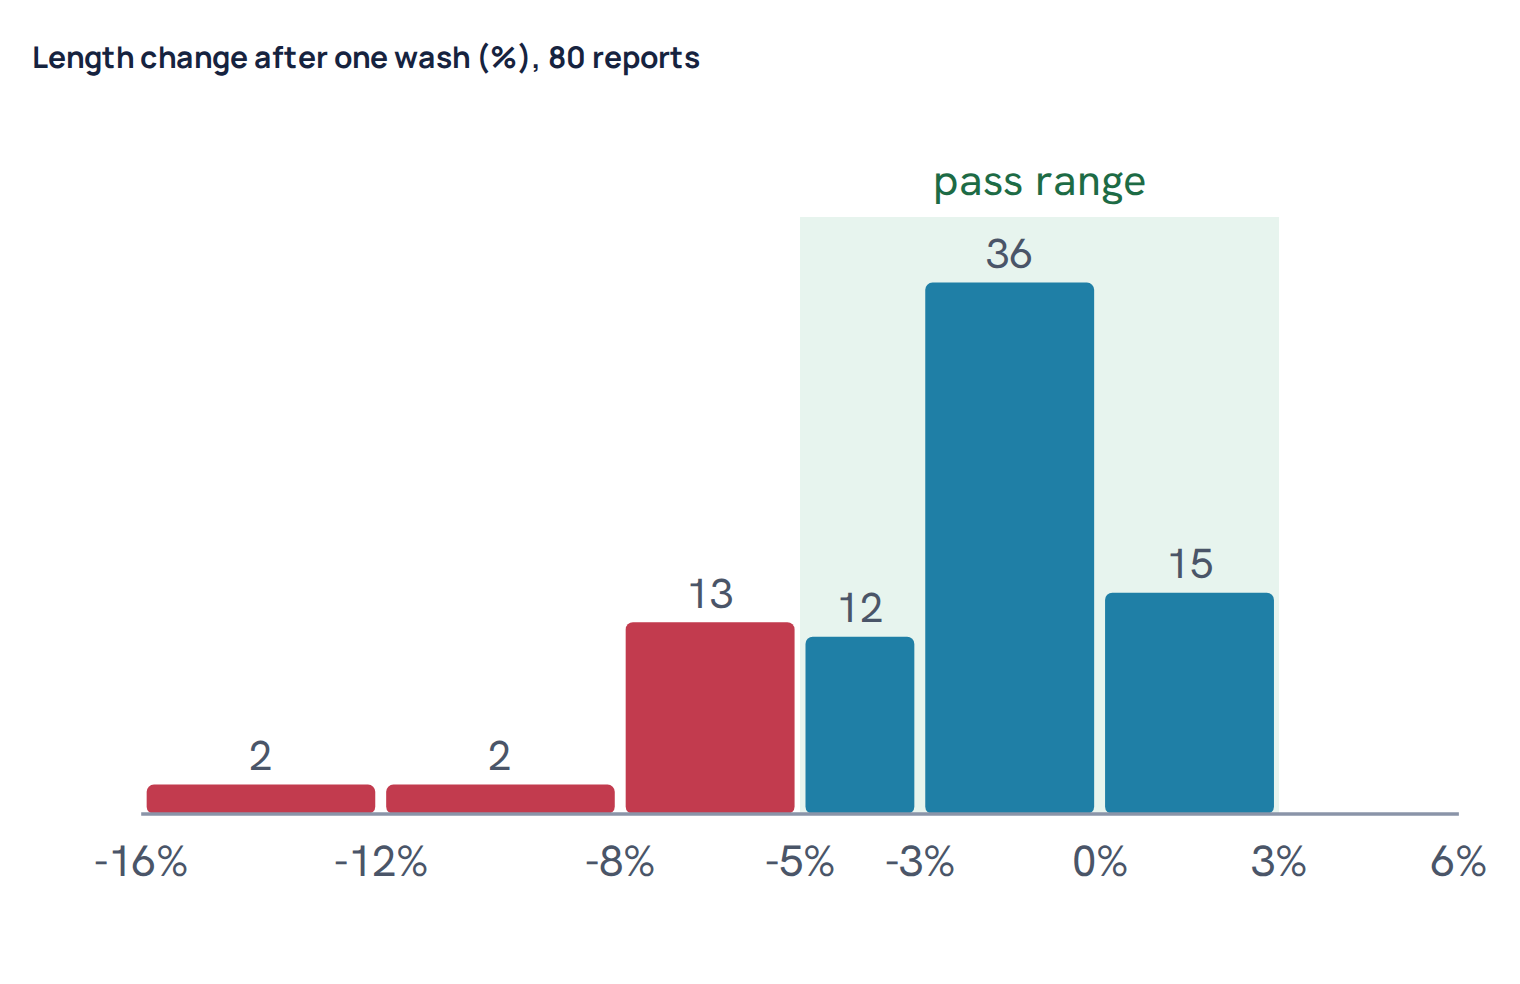
The median length change after one wash was -1.6%, against -1.0% in width: in 56 of 80 reports the length moved more than the width. Knit fabric is pulled in length all through dyeing and finishing, and the wash takes that stretch back. Where the lab also tested five washes, length shrank a further 1.8 points (median) between wash one and wash five.
62 of 93 batches passed.
| Fabric group | Tested | Passed |
|---|---|---|
| Single jersey | 18 | 10 (55%) |
| Rib | 23 | 14 (60%) |
| Interlock | 10 | 6 (60%) |
| Terry | 12 | 9 (75%) |
| Waffle | 10 | 8 (80%) |
| Fleece | 17 | 12 (70%) |
| Pique and lacoste | 3 | 3 (100%) |
Checking shrinkage in the factory before the lab
A quick factory tumble test is useful as a warning, but it is not the lab test: tumble drying is harsher than the line drying most labs use, and one wash does not show what five washes do. Before a development goes to the lab, wash a marked swatch the way the buyer’s method says, dry it the same way, and measure it after it has rested.
Common mistakes that change the result
- Marking or measuring fabric that has not been conditioned, or stretching it on the table.
- Marks too close to the edge, where the fabric curls and distorts.
- Drying by a different method from the one the buyer specifies.
- A wash load without ballast, so the mechanical action is wrong.
- Reading one pair of marks instead of the average of three.
If a batch fails, see why knit fabric fails the shrinkage test: 30 real cases.
From the floor
- Heat setting is not only for crease marks; it is mainly for dimensional stability.
- We decide it on six points: the fibre (polyester and nylon are heat set), elastane or Lycra in the fabric, the GSM, the construction (a tight knit is heat set whatever the GSM), the width and stability the buyer needs, and design fabrics, which are heat set to fix the design at the width where it shows.
- Fabric with polyester must be finished at 100–110°C on the stenter and compactor, not at the 140–150°C used for cotton.
- Let the fabric relax 12 to 24 hours before cutting.
Questions
How is fabric shrinkage calculated?
(Measurement after washing − measurement before) ÷ measurement before × 100. A minus result is shrinkage, a plus result is growth.
What is the shrinkage limit for knit fabric?
Usually ±5%, or up to 5% shrinkage and 3% growth; some buyers set ±3%.
Why test after five washes?
Fabric that is not fully relaxed keeps shrinking wash after wash; in our data length shrank further between the first and fifth wash.
Related: shrinkage and GSM after wash calculator.

Textile engineer with 14+ years in dyeing and fabric development. He writes every guide on Dyeing Solution from real production work. Full profile